Wavlink WiFi Extender Setup: Easy Installation & Troubleshooting
Are you struggling with the annoying Wi-Fi and hot spots? We have a guide to Wavlink WiFi Extender Setup exactly for that! In this guide, we will walk you through the complete extender setup procedure, from unboxing to setting up the advanced settings.
In addition, you will also learn the process to connect your extender to your router to extend the existing signal range. So, find out how to easily access the wifi.wavlink.com setup page and turn your current Wi-Fi network into an all-around, whole-home system. Follow us along for a quick repeater setup!
Different Ways of Wavlink WiFi Extender Setup
Usually, there are three ways to perform the Wavlink Repeater Setup seamlessly. The first and most preferred way is via the web GUI, the second one is an app-based setup, and the WPS button method. Before proceeding with any of these methods, make sure your device is connected to a stable internet, keep the devices handy, and correct login details.
Now, let’s dive into the quick process of Wavlink Outdoor WiFi Extender Setup as follows:
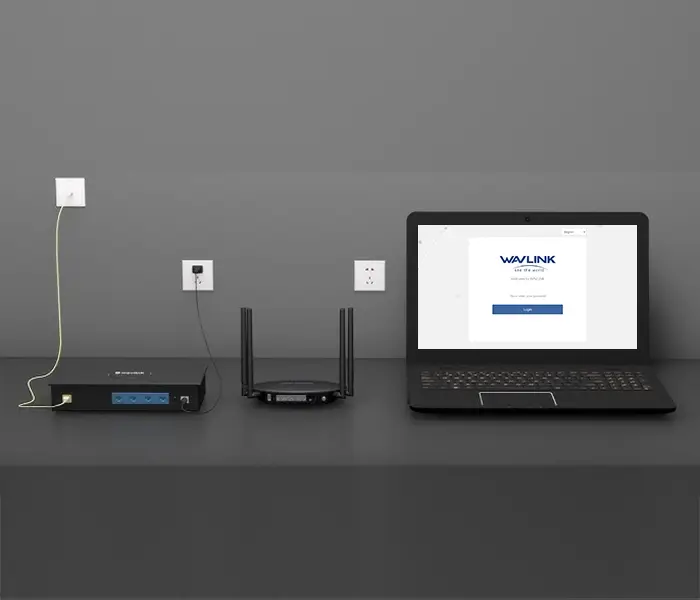
wifi.wavlink.com Setup
- Initially, plug the range extender into a working electrical outlet.
- Check the LED indicator on your device and wait till it blinks or the power light turns stable.
- Now, connect your device to the wireless or wired network.
- Further, open any web browser and navigate to wifi.wavlink.com web GUI.
- You can also use the default IP address 192.168.10.1 for logging in.
- Now, use the default extender password and tap “Login”.
- Next, you will reach the Wavlink Setup Wizard.
- After that, choose the wifi network you want to connect to and extend.
- You can connect to wifi via scanning the QR code or entering the credentials manually.
- You can connect to wifi via scanning the QR code or entering the credentials manually.
- Select repeater mode as “AP Mode” and create a new SSID or keep the old one.
- Now, enter a new password and security type.
- Apply the settings and browse the Upgrade Firmware tab, and follow the on-screen guidelines.
- Similarly, you can configure other settings on your device to complete the Wavlink Outdoor WiFi Extender Setup.
How to Perform the Wavlink Repeater Setup With the WPS Button?
In addition, you can configure your repeater using the WPS button for quick connectivity. First of all, you must ensure that your router has a sufficient power supply and an active internet connection. Further, follow these instructions for Wavlink WiFi Extender Setup:
- Initially, locate the WPS button on your extender and router.
- Then, press this button on the host router first.
- Simultaneously, press the WPS button on the extender within 2 minutes.
- Hold and wait till you see the LED on the extender turn solid blue.
- With this, your WPS connection is successful, and enjoy using the extended wifi network.
Wavlink Extender Troubleshooting: Expert Tips!
Sometimes, your Wavlink extender doesn’t work as expected. This may occur due to several reasons, from internet connectivity to Wavlink Repeater Configuration errors. However, to fix these issues, you can try these proven solutions:
- Most importantly, check that your extender is connected to a working power outlet with its power light on.
- Secondly, make sure your extender is located within the good range of the Wi-Fi signal of your main router.
- Next, verify all the physical connections and links, particularly when they are using an Ethernet cable connection to set up or Access point mode.
- Moreover, restart your main router and the Wavlink extender by turning them off and back on in 30 seconds.
- Importantly, make sure that you connect to the Wi-Fi network of the extender (it is usually your original Wi-Fi name with the suffix “_EXT” or “_R”).
- As a last resort, perform a factory reset of the Wavlink extender and try the process of setting it up once again.
What to Do If My Wavlink Not Connecting To Internet?
In case your Wavlink extender has already been powered and it is incapable of connecting you to the internet, these Wavlink Extender Troubleshooting steps might assist you in fixing the issue.
- Firstly, make sure that there is an active internet connection on your main router itself.
- Then, ensure that the Wavlink extender has established a successful connection with your primary router via the Wi-Fi network.
- Additionally, check the signal/internet LED on the extender, and it must turn solid.
- Next, attempt to start the setup process through its web interface and ensure that you cross-verify the web/IP address and login credentials.
- As an example, check the firmware of your Wavlink extender over its web interface to ensure that any connectivity-related bug fixes are available.
- Lastly, in an ideal world, perform a test connection with a device directly with your primary router to the possibility of the problem being caused by the extender or by the primary internet connection.
To sum up, you have now mastered the Wavlink WiFi Extender Setup. If you need additional information or personalized assistance, let us know in the chat box!
FAQs
How To Connect the Wavlink WiFi Extender To the Router through wired connections?
To connect your Wavlink extender to the router via wired connections, connect the Ethernet cable to the LAN port of both devices. This method is mainly preferred when you are setting up your extender as an Access Point for direct connection.
Can I perform the Wavlink WiFi extender setup without WPS?
Yes, you can configure the Wavlink repeater without a WPS connection method. These alternatives are the web-based Wavlink Setup Wizard and the App-based method.
How To Reset Wavlink WiFi Extender to its factory defaults?
To reset your Wavlink extender, press and hold the reset button for 5-10 seconds. Then, wait till the LED starts flashing, and now release the button. Your device is now reverted to its factory settings and ready for reconfiguration.
How Do I Connect My Wavlink Extender To WiFi?
If you want to directly connect your extender to wifi, then press the WPS button on the router and extender. Otherwise, use the wifi.wavlink.com Setup for connecting both devices.